There are few household nuisances as persistently annoying as a Leaky Shower Head, a constant drip-drip-drip that echoes through your bathroom long after your shower ends. Beyond the irritation, this seemingly small issue can lead to significant water waste, increased utility bills, and even hidden damage like mold and structural compromise over time. Addressing a leaky shower head promptly is crucial for maintaining both your sanity and your home’s integrity. This guide will delve into everything you need to know about identifying, understanding, and effectively resolving a leaky shower head, transforming your shower back into a haven of relaxation.
Understanding Shower Heads: An Overview and Common Types
Shower heads, essential fixtures in any modern bathroom, have evolved considerably from simple spouts to sophisticated systems offering diverse spray patterns and features. Historically, early bathing involved pouring water over oneself, but the invention of pressurized water systems paved the way for the shower head as we know it today. Contemporary designs prioritize both functionality and aesthetics, providing a range of experiences.
Understanding the common types of shower heads can offer insight into potential leak points, as different designs have unique connection methods and internal components.
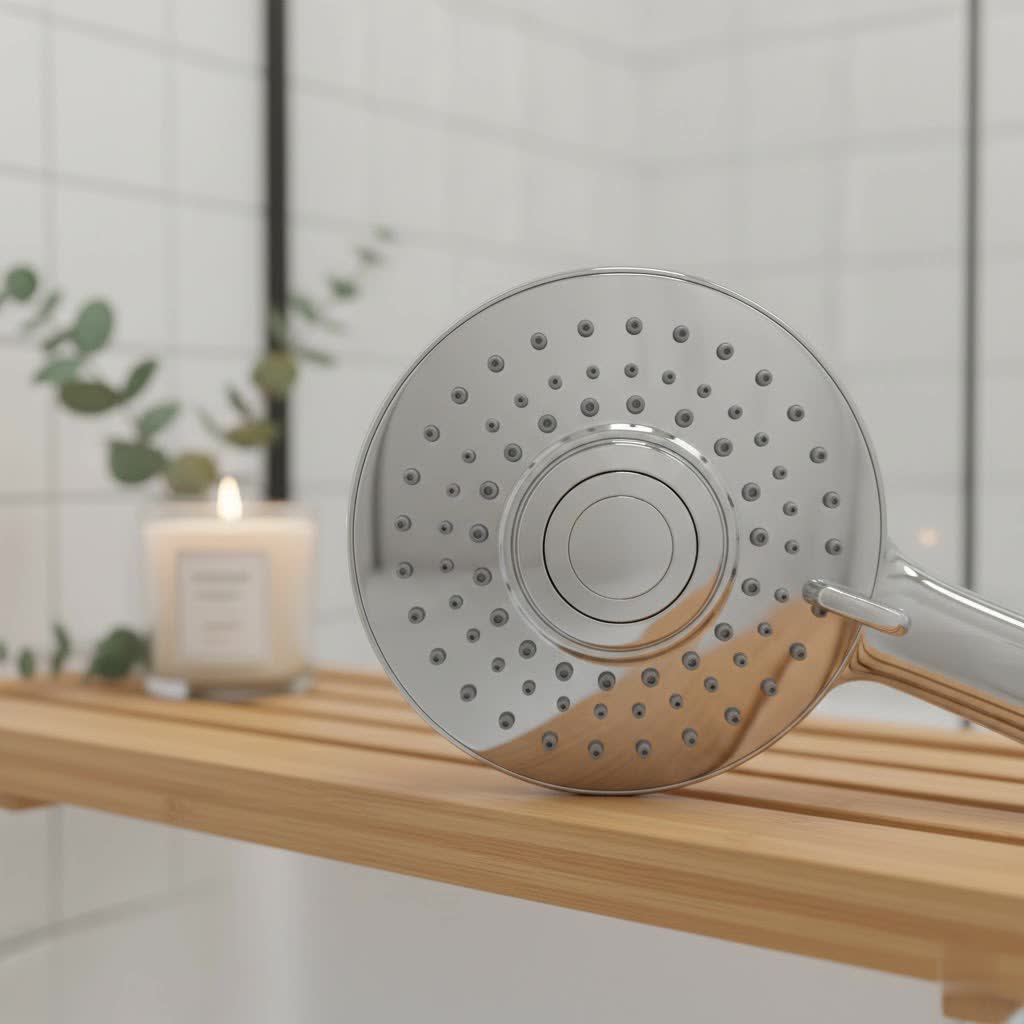
Fixed Shower Heads
- Description: Permanently mounted to the shower arm extending from the wall or ceiling.
- Design: Often minimalist, offering a clean, integrated look. Available in various shapes (round, square) and sizes (rainfall, standard).
- Features: May include multiple spray settings controlled by a dial on the head.
- Leak Relevance: Leaks typically occur at the connection point to the shower arm due to loose threads, worn washers, or mineral buildup.
|
Our Picks for the Best Shower Head in 2026
We may earn a commission when you use one of our links to make a purchase.
|
||
| Num | Product | Action |
|---|---|---|
| 1 | Cobbe All Metal Shower Head with Handheld – Solid Stainless Steel 3-Mode High Pressure Showerhead, Detachable Wand with 59" Hose & Adjustable Bracket Water Saving Eco-Flow, Brushed Nickel |

|
| 2 | SparkPod Shower Head - High Pressure Rain - Premium Quality Luxury Design - Easy Clean Adjustable Replacement for Your Bathroom Shower Heads (Luxury Polished Chrome, 6 Inch Round) |
|
| 3 | High Pressure Rain Shower Head: Upgrade Shower Heads with Handheld Spray Combo with Fixed Showerhead and 10 Sprays Handheld Shower Head, Detachable Showerheads Built-in Magnetic Docking and Power Jets |
|
| 4 | SparkPod Shower Head - High Pressure Rain - Premium Quality Luxury Design - Easy Clean Adjustable Replacement for Your Bathroom Shower Heads (Elegant Brushed Nickel, 6 Inch Round) |
|
| 5 | Shower Head with Handheld High Pressure, Rain Shower Head with Fixed Showerhead and 9 Sprays Handheld Shower, Detachable 2-IN-1 Shower head with 59" Rotatable Stainless Steel Hose (Chrome) |
|
| 6 | SparkPod Shower Head - High Pressure Rain - Premium Quality Luxury Design - Easy Clean Adjustable Replacement for Your Bathroom Shower Heads (Egyptian Gold, 6 Inch Round) |
|
| 7 | High Pressure Rain Shower Head: Upgrade Shower Heads with Handheld Spray Combo with Fixed Showerhead and 10 Sprays Handheld Shower Head, Detachable Shower head Built-in Power Jets |
|
| 8 | SparkPod Shower Head - High Pressure Rain - Premium Quality Luxury Design - Easy Clean Adjustable Replacement for Your Bathroom Shower Heads (Midnight Black Matte, 6 Inch Round) |
|
| 9 | SparkPod Shower Head - High Pressure Rain - Premium Quality Luxury Design - Easy Clean Adjustable Replacement for Your Bathroom Shower Heads (Charcoal Grey, 6 Inch Round) |
|
| 10 | High Pressure Rain Shower Head: Upgrade Shower Heads with Handheld Spray Combo with Fixed Showerhead and 10 Sprays Handheld Shower Head, Detachable Showerheads Built-in Magnetic Docking and Power Jets |
|
Handheld Shower Heads
- Description: Connected to the shower arm via a flexible hose, allowing for greater maneuverability.
- Design: Combines a fixed bracket with a detachable head, often featuring ergonomic grips.
- Features: Ideal for rinsing specific areas, cleaning the shower, or bathing children and pets. May also include various spray modes.
- Leak Relevance: Prone to leaks at the shower arm connection, the hose connections (both to the arm and the head), and within the handheld unit itself due to internal seal wear.
High-Pressure Shower Heads
- Description: Designed to enhance water flow, particularly in homes with low water pressure.
- Design: Often features smaller nozzles or internal mechanisms to restrict flow volume while increasing velocity.
- Features: Provides a powerful, invigorating spray.
- Leak Relevance: The increased internal pressure can put more strain on seals and connections, potentially exacerbating existing weaknesses and leading to leaks if components are not robust or properly installed.
Water-Saving Shower Heads
- Description: Engineered to reduce water consumption without significantly compromising the showering experience.
- Design: Incorporates flow restrictors or aerating technologies to mix air with water, maintaining pressure while using less water.
- Features: Environmentally friendly and cost-effective, helping to lower water bills.
- Leak Relevance: Like any shower head, wear and tear on internal components or connections can still lead to leaks, negating their water-saving benefits if not repaired.
Massage Shower Heads
- Description: Features adjustable spray patterns that can create pulsating or targeted streams.
- Design: Often includes a rotating dial or lever to switch between different spray functions.
- Features: Provides a therapeutic, muscle-relaxing effect.
- Leak Relevance: The internal mechanisms for changing spray patterns can sometimes be points of failure if seals or diversions wear out, leading to leaks from the head itself.
Filtered Shower Heads
- Description: Contains a filtration system to remove impurities like chlorine, sediment, and heavy metals from the water.
- Design: Typically larger to accommodate the filter cartridge, which requires periodic replacement.
- Features: Aims to improve skin and hair health, and reduce mineral buildup on fixtures.
- Leak Relevance: Leaks can occur at standard connection points or if the filter housing itself is improperly sealed or damaged.
Comparing Common Shower Head Types
Here’s a brief comparison of some popular shower head types:
| Feature | Fixed Shower Head | Handheld Shower Head | High-Pressure Shower Head | Water-Saving Shower Head |
|---|---|---|---|---|
| Function | Consistent, stationary spray | Flexible, targeted rinsing | Powerful spray for low-pressure homes | Reduces water consumption, maintains decent pressure |
| Design | Sleek, integrated into wall/ceiling | Detachable head with flexible hose | Varies, often with optimized nozzles | Varies, often with aerating technology |
| Price | Moderate | Moderate to High | Moderate | Moderate |
| Pros | Aesthetic, reliable, simple installation | Versatile, easy cleaning, good for children/pets | Invigorating, good for thick hair | Eco-friendly, lower water bills |
| Cons | Less flexibility, can’t clean shower easily | May look cluttery, hose can wear | Can be loud, may not suit all preferences | Lower flow rate than standard heads |
| Overall | Standard choice for most bathrooms | Highly functional and convenient | Solves low-pressure problems effectively | Responsible and economical choice |
Identifying the Source: Types of Leaks and Their Clues
Before you can fix a leaky shower head, you need to understand where the water is coming from and what it indicates. Not all drips are true leaks, and the location of the leak can pinpoint the underlying problem.
Constant Drip (When Water is Off)
If your shower head continues to drip long after the water has been turned off, it often points to an issue with the shower valve cartridge. This internal component regulates water flow and temperature. When the cartridge wears out or becomes faulty, it can no longer create a complete seal, allowing water to slowly seep through the valve and out the shower head. This type of leak is typically unrelated to the shower head itself.
Leaking When Water is On
Leaks that occur primarily when the water is running usually originate at the shower head or its immediate connection to the shower arm. This could be due to a loose fitting, a worn-out gasket or O-ring within the connection, or internal damage to the shower head body. Water may visibly stream or spray from the connection point rather than solely from the nozzles.
Water Squirting from Unusual Places
When water squirts or seeps from areas other than the intended spray nozzles, such as the swivel joint of a fixed shower head, the connectors on a handheld model, or hose connections, it often indicates loose connections, damaged threads, or compromised seals. This forceful escaping water is a clear sign that a seal is failing under pressure.
Visible Mineral Deposits
Hard water contains minerals like calcium and magnesium, which can accumulate over time. If you notice white or off-white, crusty buildup around your shower head’s nozzles or at its base, these mineral deposits can clog the spray holes. When water cannot exit through the intended nozzles, it finds alternative escape routes, often leading to leaks around the edges of the shower head or from unexpected points.
Hidden Leaks
Sometimes, the leak isn’t immediately visible at the shower head itself. If you hear unusual dripping sounds behind the wall or notice water stains on the ceiling below the bathroom or on nearby floors, you might have a more serious, hidden leak. These leaks often originate from damaged pipes or faulty connections within the wall, requiring immediate professional attention to prevent extensive water damage, mold growth, and structural issues.
Common Culprits Behind a Leaky Shower Head
Understanding the root causes of a leaky shower head is the first step toward a successful repair. Several factors, from simple wear and tear to more complex plumbing issues, can contribute to that persistent drip.
Worn-Out Washers and O-Rings
One of the most frequent reasons for a leaky shower head is worn or degraded rubber washers and O-rings. These small, inexpensive components are critical for creating watertight seals within the shower head’s connections and internal mechanisms. Over time, due to constant water pressure, temperature fluctuations, and chemical exposure, these rubber seals can harden, crack, or lose their elasticity, allowing water to escape. Replacing these components is often a quick and effective fix.
Mineral and Limescale Buildup
If you live in an area with hard water, mineral and limescale buildup is a common culprit. Hard water contains high levels of dissolved minerals that, over time, can accumulate inside the shower head and its nozzles. This buildup can clog the tiny openings, restrict proper water flow, and force water to leak out through gaps or weak points in the shower head’s structure. Visually, you might see a chalky white residue on the fixture.
Loose or Damaged Connections and Threads
A loose connection between the shower head and the shower arm (the pipe extending from your wall) is a straightforward, yet common, cause of leaks. The threads may simply need tightening. However, if the threads on either the shower head or the arm are damaged, stripped, or corroded, a secure seal becomes impossible, leading to a leak. Overtightening can also compress gaskets excessively, causing damage and subsequent leaks.
Faulty Shower Valve or Cartridge
As mentioned, if the shower head leaks when the water is off, the problem likely lies with the shower valve cartridge. This cartridge controls the water flow and temperature from the shower handle. A worn, cracked, or defective cartridge can fail to completely shut off the water supply, allowing a trickle to pass through and exit the shower head. Replacing a shower cartridge can be more involved than other repairs and may require shutting off the main water supply to your home.
High Water Pressure
While a strong shower is often desired, excessively high water pressure can contribute to leaks. High pressure puts increased strain on all components of your plumbing system, including the shower head’s seals, gaskets, and internal parts. Over time, this constant stress can accelerate wear and tear, forcing water through small gaps that would otherwise remain sealed under normal pressure. If high water pressure is a house-wide issue, it may require adjusting a pressure-reducing valve.
Cracked Shower Head or Pipe
In more severe cases, a leak might be caused by a crack in the shower head body itself or in the shower arm/pipe behind the wall. Physical damage, freezing temperatures, or simply old age can lead to these cracks. A visible crack on the shower head means it needs replacement. A crack in the wall pipe is a more serious issue, often requiring professional intervention to access and repair the plumbing.
Step-by-Step Guide: How to Fix a Leaky Shower Head
Most leaky shower heads can be fixed with a few basic tools and a bit of DIY effort. Here’s a step-by-step guide to tackling the most common issues.
Essential Tools and Materials
Before you begin, gather the following:
- Adjustable Wrench or Pliers: For loosening and tightening the shower head.
- Soft Cloth or Towel: To protect the fixture’s finish from scratches and for cleaning.
- Scrub Brush or Old Toothbrush: For cleaning mineral buildup.
- White Vinegar: An effective, natural descaler for mineral deposits.
- Plumber’s Tape (Thread Seal Tape): Creates a watertight seal on threaded connections.
- Replacement Gaskets/Washers: Small rubber rings found inside the shower head connection.
- Flathead Screwdriver or Paper Clip: To remove old washers or clear debris.
- Replacement Shower Cartridge (if needed): Specific to your faucet brand and model.
Turning Off Water Supply
Crucial First Step: Before any work begins, turn off the water supply to your shower. For many showers, this means turning off the main water supply to your entire house. If your shower has individual shut-off valves, use those. Once the water is off, open the shower faucet briefly to drain any residual water from the pipes.
Cleaning Mineral Buildup (Vinegar Soak)
Mineral buildup is a common cause of reduced water flow and leaks.
- Remove the Shower Head: Using a wrench or pliers wrapped in a soft cloth, carefully unscrew the shower head from the shower arm by turning counter-clockwise. If it’s stiff, gently hold the shower arm with another cloth-wrapped tool to prevent it from twisting.
- Soak in Vinegar: Place the detached shower head into a container filled with white vinegar. Ensure the entire head, especially the nozzles, is submerged. For light buildup, 30 minutes to an hour may suffice. For heavier deposits, you can soak it for several hours or even overnight. Note: For brass, gold, or nickel finishes, limit soaking to 30 minutes to prevent damage.
- Scrub and Rinse: After soaking, use a scrub brush or old toothbrush to thoroughly clean the nozzles and any other affected areas. Rinse the shower head under hot water to remove loosened debris and vinegar residue.
Tightening Loose Connections
Sometimes, a leak is simply due to a loose connection.
- Hand-Tighten: After cleaning (or if cleaning isn’t necessary), try hand-tightening the shower head back onto the shower arm by turning it clockwise.
- Wrench-Tighten (Gently): If hand-tightening isn’t enough, use your cloth-wrapped wrench or pliers to give it a slight turn, being careful not to overtighten. Overtightening can strip threads or crack components, leading to worse leaks.
Replacing Worn Washers and O-Rings
If tightening doesn’t stop the leak, the internal rubber washer or O-ring might be worn.
- Locate and Remove: With the shower head removed, inspect the connection point where it attaches to the shower arm. You should see a small rubber washer or gasket inside the nut. Use a small flathead screwdriver or paper clip to gently pry out the old washer. Some shower heads also have O-rings inside the swivel joint.
- Replace: Take the old washer to a hardware store to find an exact match in size and thickness. Insert the new washer securely into its rightful place.
Applying Plumber’s Tape
Plumber’s tape (also known as thread seal tape or Teflon tape) creates a tighter seal on threaded connections.
- Clean Threads: With the shower head removed, ensure the threads on the shower arm are clean and free of old tape or debris.
- Wrap Clockwise: Starting at the end of the threads, wrap the plumber’s tape clockwise around the shower arm threads 4-5 times. Ensure the tape lies flat and covers all the threads without bunching up. Wrapping clockwise ensures it tightens onto the threads rather than unraveling when you screw the shower head back on.
- Reinstall: Screw the shower head back onto the taped threads, hand-tightening first, then a gentle turn with a cloth-wrapped wrench until secure.
Replacing the Shower Cartridge
If your shower head leaks when the water is off, the shower cartridge is the likely culprit. This is a more advanced DIY task.
- Identify Cartridge Type: Different manufacturers (Delta, Moen, Kohler, etc.) use different cartridges. You’ll need to identify your faucet’s brand and model to purchase the correct replacement.
- Access the Cartridge: Remove the handle and any trim plates to expose the valve body. You may need a screwdriver to remove retaining screws.
- Remove Old Cartridge: Follow the manufacturer’s specific instructions for your valve type to remove the old cartridge. This often involves pulling or unscrewing it.
- Install New Cartridge: Insert the new cartridge, ensuring it’s correctly oriented (some have specific alignment notches). Reassemble the handle and trim.
- Test: Turn the water supply back on slowly and check for leaks. If you are uncomfortable with this task, it’s advisable to hire a licensed plumber to prevent further damage.
When to Call a Professional Plumber
While many leaky shower head issues are simple DIY fixes, some situations warrant the expertise of a professional plumber. Knowing when to call in the pros can save you time, stress, and potentially more extensive damage.
- Persistent Leaks After DIY Attempts: If you’ve tried all the common fixes – tightening connections, cleaning the head, replacing washers, and applying plumber’s tape – and the drip stubbornly continues, there might be a more complex underlying problem that requires diagnostic tools and specialized knowledge.
- Leaks Behind the Wall: Any indication of water leaking inside your walls, such as water stains on the ceiling below, damp drywall, or unusual dripping sounds coming from within the wall, is a serious concern. These hidden leaks can lead to significant structural damage, wood rot, and mold growth if not addressed immediately by a professional. A plumber can use specialized equipment to locate the source without extensive demolition.
- Complex Cartridge Replacement: While replacing a shower cartridge can be a DIY task, some valve designs are intricate, or the old cartridge might be stuck due to mineral buildup. If you’re unsure about the process, cannot identify the correct replacement part, or encounter difficulty removing the old cartridge, a plumber has the tools and experience to handle it efficiently and correctly.
- Whole-House High Water Pressure Issues: If you suspect high water pressure is causing not just your shower head to leak but also affecting other fixtures or appliances in your home, a plumber can accurately measure your home’s water pressure and install or adjust a pressure-reducing valve to protect your entire plumbing system.
> “Ignoring a persistent drip can be a costly mistake. What starts as a minor annoyance can quickly escalate into significant water damage or even mold issues if the leak is hidden behind walls. When in doubt, a professional assessment is always the safest bet for your home and your wallet.” – John Smith, Master Plumber with 20+ years experience
Conclusion
A leaky shower head is more than just a minor inconvenience; it’s a silent drain on your resources and a potential threat to your home’s structure. Understanding the various causes, from common culprits like worn washers and mineral buildup to more serious issues such as a faulty valve cartridge or hidden pipe damage, is key to effective troubleshooting. By following simple steps like cleaning, tightening, and replacing components, you can often restore your shower head to its leak-free glory. Remember, prevention through regular cleaning and prompt attention to minor drips can save you from bigger headaches down the line. Don’t let a small leak turn into a major problem – empower yourself with the knowledge to fix it or know when to call in a professional. What simple maintenance steps will you take today to keep your shower running perfectly?
Câu Hỏi Thường Gặp
How much water does a leaky shower head waste annually?
A persistently dripping shower head can waste a significant amount of water, often accumulating to 347 gallons per year, and sometimes even over 1,000 gallons if it drips at a faster rate of approximately 30 drops per minute. This waste not only impacts the environment but also leads to higher utility bills.
Can a leaky shower head cause mold?
Yes, absolutely. While a visible drip is annoying, if water leaks from connections behind the wall or seeps into surrounding structures, it creates a damp environment perfect for mold growth. Hidden leaks can lead to extensive mold, mildew, and even dry rot, compromising air quality and structural integrity.
What is plumber’s tape and how does it help a leaky shower head?
Plumber’s tape, also known as thread seal tape or Teflon tape, is a thin, white, non-adhesive film used to create a watertight seal on threaded pipe connections. When wrapped around the threads of a shower arm before installing the shower head, it fills tiny gaps, preventing water from escaping and effectively stopping leaks at the connection point.